Friday, January 30, 2015

Raspberry-Honey and Blackberry-Honey Butter on Toast

Last month I had the pleasure of winning the December book Birchbox featured in their bookclub! Not only is it exciting to win something, but this was an amazing cookbook which is obviously right up my alley. So when my Homemade Decadence cookbook by Joy Wilson came, I was beyond stoked and wanted to start whipping things up right away! I started with the first recipe in the book because I already had all the ingredients and like I said, I just had to get started right away. It is a super easy recipe for fruit infused butter. Joy did hers with the raspberries and since I also had blackberries, I decided to try those too! The results were amazing. It is something so simple that will wow your family (or guests) at your next breakfast or brunch, or keep it for yourself because it lasts up to three days. When you make this, make sure you follow the plastic wrap step. I did one with and one I just placed in a Pyrex container. The one in the Pyrex was a little more runny then I would have liked, but tasted good nonetheless. Whether you are in a pinch and need something "fancy" or just want to serve something a little different, you should try this recipe out. You will love it I'm sure! Stay tuned for Roasted-Potato Breakfast Nachos, the next recipe I made from my wonderful cookbook! As always, enjoy! 


Fresh Raspberry-Honey Butter and Fresh Blackberry-Honey Butter 

Ingredients
1/2 cup (1 stick) Unsalted butter, divided in half, room temperature
4 Raspberries
4 Blackberries 
2 Tablespoons Honey, divided
1/4 teaspoon salt, divided 

Divide the butter between two bowls. In one, place the raspberries, 1 Tablespoon honey and a dash of salt. In the other place the same except add the blackberries to it. Mash the ingredients together with a fork until somewhat combined. Scoop the butter into plastic wrap, pressing down to form a disk shape. Refrigerate until ready to use. 


Thursday, January 29, 2015

Mint Chip Smoothie

Ok so I know calling this a smoothie is a bit of a stretch, but whenever I am craving something sweet for lunch I often make this because it curbs my sweet tooth and is extremely low-cal (180 calories to be exact.....side note, the nutrition information for the Mint Chip Dessert says 170 on the website, but my carton says 150). Bonus! You could also make it in lieu of a regular milkshake for dessert if you want something less caloric or you are going dairy-free. Now I am not fully dairy-free and as of right now I don't know that I ever will be, but I am somewhat being more mindful about the things I eat. Not always, obviously, but for the most part. I use Silk Unsweetened Almond Milk in most of my smoothies and recently discovered their Cashew Milk which I am excited to try. I also discovered this So Delicious brand as I was looking for a dairy-free alternative to traditional ice cream. I am a huge fan of anything Mint Chocolate Chip and this dairy-free dessert is nothing short of amazing! And for everyone else with certain dietary needs or healthy lifestyles, it is also soy and gluten free! Yay! They have so many products, especially desserts, that I can't wait to try! Even if you aren't dairy-free, if you love mint chip, I guarantee you will love this product and this smoothie/shake! Enjoy!        


Mint Chip Smoothie

Ingredients
1 cup Unsweetened Almond Milk
Handful of ice cubes

Optional
Scoop of protein powder

Place all ingredients in a blender and blend until desired consistency. 

Monday, January 26, 2015

Cricket Hill Brewery


This is Kevin McClarnon, Casey's husband.  It has been decided that craft beer is my domain so I am here to share our hoppy story.  The second brewery that Casey and I visited since moving to NJ is Cricket Hill Brewery based out of Fairfield, NJ.  It is fairly close to where we live, and I randomly bought, and enjoyed their Hypnotic IPA giving us reason enough to kill a Saturday there.


The tour itself was pretty unremarkable, it seemed as though it is a typical microbrewery.  Fun fact: brewery tours are required for tastings at breweries in NJ.  The brewery was cool but nothing about it stood out in comparison to some of the other breweries and tours that we've been in on.  One highlight was the presentation of the chemical equations that go into brewing.  It was over both of our heads, but interesting nonetheless.


The tastings were ample and of a generous size.  We sampled Cricket Hill's American Pale Ale, Colonel Blides ESB, East Coast Lager, Hopnotic IPA, and their Pumpkin Ale out of their year-round brews.  The small batch brew on tap was their Sim-Notic Imperial IPA.  The IPA and Imperial IPA were pretty good, not great, as was the East Coast Lager.  The rest of their offerings were mediocre at best.  I'm not a fan of pumpkin beers, so I'm biased, but I found their pumpkin ale to be disgusting.  All in all we had a blast trying out new beers(who doesn't?), but were not overly impressed with Cricket Hill's offerings.  We much preferred the atmosphere and staff at New Jersey Brewing Co., but were definitely pleased with the sizes of the tastings at Cricket Hill.

Bottom Line:  If you are seeking to try a new, above average IPA, give Cricket Hill a shot.  Just know that there are better ones out there, presumably closer to where you live.


Friday, January 23, 2015

Nacho Crusted Crescent Dog

This is one of those recipes that reminds me of sitting around the table and having a family game night. You want something that is portable, but yet not something that will make you leave the intense board game that is going on. Well this recipe, found here, quick and easy and that you think you'll eat a ton of, but it is surprisingly filling. My husband picked up two and was struggling to finish the second and that guy can eat! The cheese is ooey and gooey on the inside and the chips provide a nice crunch on the outside. I think it is wonderful as is, but you can serve it with a dipping sauce if you would prefer. It is perfect for all ages, but I think the kids will especially love this one! In under 30 minutes your dinner will be hot and ready and you can focus on winning your family game night! It's a win-win for you! Enjoy! 


Nacho Crusted Crescent Dog

Ingredients
1 8 count can crescent rolls
4 slices cheese (I used Velveeta)
4 hot dogs (I used Nathan's all beef hot dogs)
Approximately 1 cup Nacho cheese chips, crushed
Approximately 1/2 cup Milk or water

Preheat oven to 375 degrees (or as directed on your crescent can). Prepare baking sheet with foil or Silpat.

Unroll your crescents, dividing into 4 rectangles. Place one slice of cheese on top followed by one hot dog. Fold the ends of the crescent rectangles over the hot dogs. Fold one of the longer ends over the hot dog and roll, sealing the edges. Roll the crescents in milk or water then dip into the crushed nachos, pressing slightly. Place on baking sheet seam side down.

Bake as directed on can (I had to let mine bake about 7 minutes more) and let sit 5 minutes before serving.  

Thursday, January 22, 2015

Apple Carrot Juice

Today I bring you a very basic juice recipe. It is great if you are a newbie to juicing (which I am) and aren't quite sure what all to put in your juices yet. I am planning on getting into more intricate juices, but for now, this one is great. It tastes just like apple juice and you have the added benefit of 2 servings of carrots. You know how the saying "An apple a day.....". If you are a newbie like me, or want to do a cheap and easy juice, try it out. You can always add more to it the next time! Enjoy!  


Apple Carrot Juice

Ingredients 
2 Apples, cut into a few wedges
6 ounces baby carrots (2 servings)

Juice all your ingredients together. :)

Wednesday, January 21, 2015

January Birchbox Review: Sumita Contrast Eyeliner in Jaipur Gold

Now I have to admit, when I first saw this eyeliner in my box, I wasn't too thrilled. I love a good eyeliner, but I wasn't so sure of the color. That was until I first swatched the Jaipur Gold color on my hand. I noticed it was a greenish brown with gold sparkles in it. It immediately made me think of my hazel eyes and that it could potentially bring out their color. And that it did, especially on my lower lash line. The gold really made my eyes pop and brought out the greener side that rarely shows (the picture doesn't really show it at all). Also, it has real staying power. The spot that I swatched on my hand last through T-25 and me trying to rub it off (see the video). It glides on easily which is also another plus. The only downside is that I didn't see it sold solo on Birchbox, but in the East Meets West set (also gorgeous colors). I will definitely have to purchase this eyeliner even if the set is the only way I can get it (I wouldn't mind though). Sumita also has some other really fun, bright, and daring colors to check out if this color isn't your style. They are sure to be bold and last through the night!  


Monday, January 19, 2015

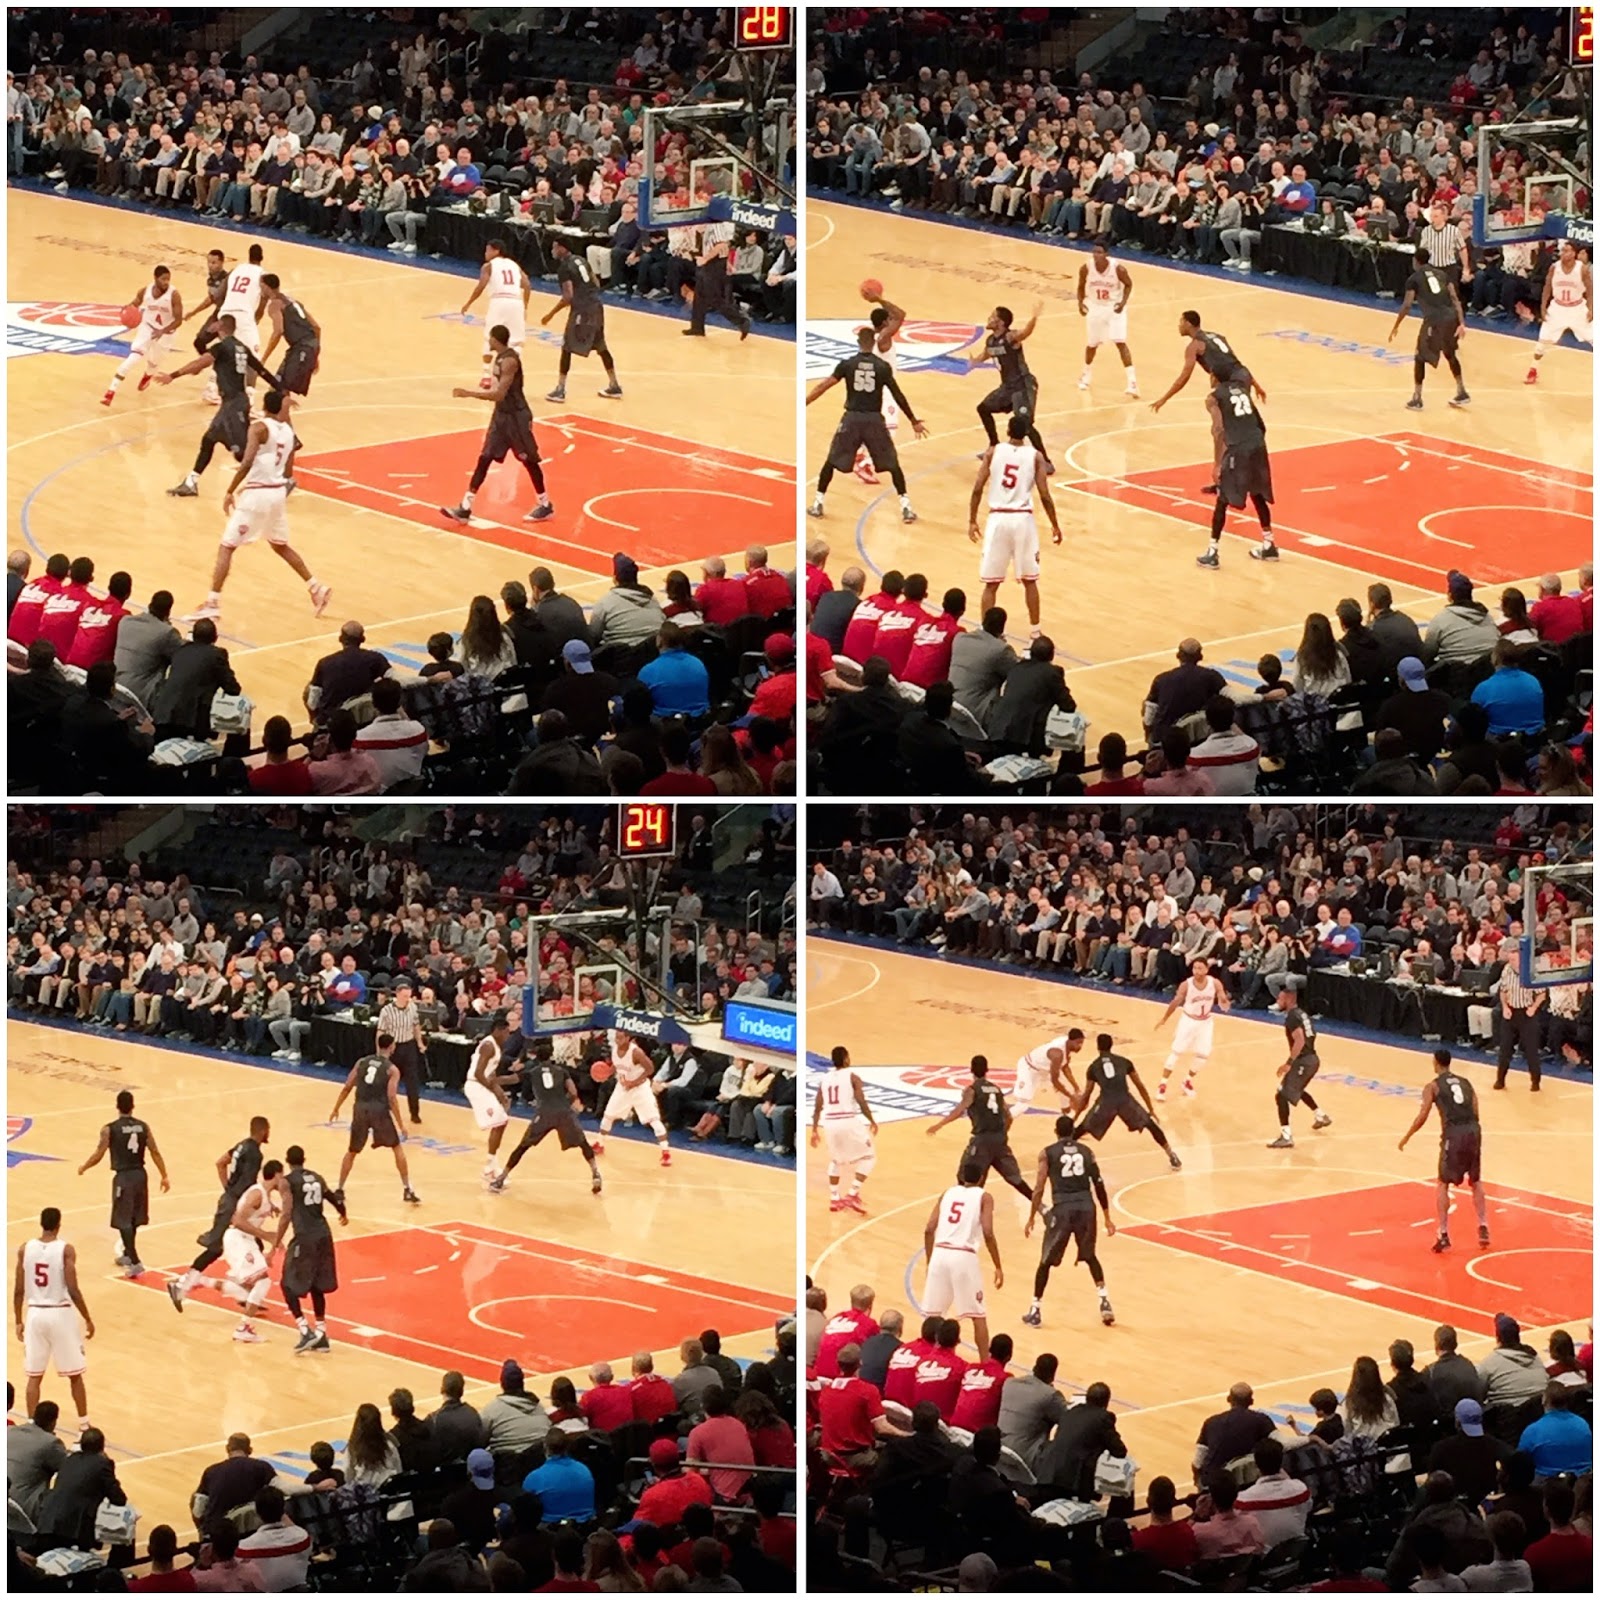
IU vs. Georgetown at Madison Square Garden


Last week I told you MSG has been our home away from home this winter and I wasn't kidding. Don't worry though, I don't have any other posts from Madison Square Garden planned in the foreseeable future so you will get a little break! However, I still am wrapping up the holiday posts. I am almost all caught up which is so exciting for us all I know!  


Ever since I was born, cheering for Indiana University has been instilled in my mind. I can look through old family photos and see many in which I am dressed in something with the Hoosier logo on it. So it was no surprise to my family where I decided to attend college. While there, my dad came and went to quite a few basketball games with me. It was such a fun bonding time for us (now you can see why I started loving sports), so when he came out to visit me, it only seemed fitting to repay the favor and take him to a sporting venue he had never been to, The Garden! I mean what are the odds that your home team from the midwest is playing in NYC while you're there! The game had the same energy I knew and loved from attending games at Assembly Hall. The crowd was up and down the entire game, especially in the last minutes when they went into overtime. Sadly, the Hoosiers didn't pull out a win (they lost 91-97), but it was such an amazing time to share with my dad, one that I'll never forget! 


Friday, January 16, 2015

Avocado, Cream Cheese, and Salsa-Stuffed Puff Pastries

Even if your football team isn't still in the running for the Super Bowl (my Colts still are so far, YAY), you will probably have or go to a Super Bowl party. It's an event that appeals to a great deal of people. You might be cheering for the team playing against the one who knocked out your team, just want to see the commercials or half-time show, or don't really care about any of it and just want to socialize and eat. Whatever your motive, appetizers will need to be made and eaten by all. Why not make your friends think you spent all day in the kitchen with these "fancy" appetizers that are really easy. The recipe for these, the original is found here, is easy and you can customize them if you want different kinds or aren't a fan of avocado. My hubby isn't an avocado fan so he did some with jalapeño instead. Try different salsas, different flavors of cream cheese, or even add a new ingredient like bacon. No matter what you choose, they will be devoured and leave everyone wondering how you had time to make something so fantastic! Enjoy!   


Avocado, Cream Cheese, and Salsa-Stuffed Puff Pastries

Ingredients

1 large sheet puff pastry, thawed
1 ripe avocado, halved and mashed
1/3 cup cream cheese (approximately 1 teaspoon of cream cheese per pastry square)
1/3 cup salsa (approximately 1 teaspoon of salsa per pastry square
1 egg, beaten

Preheat oven to 400 degrees. Prepare a baking sheet with parchment paper, Silpat liner (recommended), or spray them very well with cooking spray.

Thaw one piece puff pastry according to package direction, making sure it is completely thawed. Flour your working surface and roll out the pastry as thinly as desired into a square shape.

With a pastry or pizza cutter, cut the puff pastry into approximately 16 squares. An easy way to is to get them as even as possible is to start on one side. Cut the pastry in half, then those two halves in half. Repeat going the other direction. You will now have 8 bottoms and obviously 8 tops.

On the 8 bottoms, place a little bit of the avocado, about 1 teaspoon cream cheese, and about 1 teaspoon salsa. Place the 8 "tops" on top and seal by pressing the edges with a fork. If your fork sticks, dip in flour before pressing on the pastry. Once all are completely sealed, brush the tops with the beaten egg.

Bake for 15 to 20 minutes, or until browned and heated through. 

Remove from the oven, let cool slightly, and serve while still warm.

Thursday, January 15, 2015

Jalapeño Cheddar Bagel

Since this is a new year, I decided to change things up ever so slightly on my blog. Not a big change or anything, but I like my dedicated days to certain material that way if you aren't a fan of one thing, maybe there is something else you prefer and know what day to look for it. Like I said, it's not a huge change and you probably wouldn't notice if I didn't bring it up :). On Thursdays, instead of just doing a regular (mostly dinner) recipe, I am going to do quick and easy recipes. They will be simple breakfast, lunch, or even dinner items such as the one I'm starting with today or, things such as smoothies and juices. It will also be super helpful for those with the New Years resolution to lose weight, get healthy, etc. because I these are things I generally eat and calculate the calories for so I'm sharing the information. I can't stick to a certain diet type because I love food too much, but I can count calories, super easy thank to my Fitbit. So without further delay, I bring you the first of my quick and easy recipes. 

This jalapeño cheddar bagel has been one of my favorite things to eat lately. It is great because you can really eat it any time of the day. It's a perfect savory breakfast, a great quick lunch, a hearty snack, or I have even served it (half to each of us) with tomato soup in lieu of grilled cheese. You can obviously add more of any of the ingredients listed, but the way I make it come to between 205-210 calories (the jalapeños are the variance in the number). In under 10 minutes you can have a flavorful meal that won't hurt your waistline! I am addicted to these and you will be too once you try them! Enjoy!  


Jalapeño Cheddar Bagel

Ingredients
Bagel slim (I use Thomas brand Everything bagels)
1 Tablespoon cream cheese (I use 1/3 less fat Philadelphia, split between the two halves)
Jalapeño slices
1/8 cup cheddar cheese, shredded 

Preheat your broiler. Spread the cream cheese on the two bagel halves. Top with as many jalapeño slices as desired. Sprinkle with cheddar cheese. Broil about 3-5 minutes or until cheese is melted.

Wednesday, January 14, 2015

December Birchbox Review: RUFFIAN Red Nail Lacquer and Custom NCLA nail wraps


The classic color red has been particularly huge this season. You can't walk out the door and not see someone with red lips, accessories, or nails, myself included. The best thing about this classic color is that it never goes out of style. It has been around for years and isn't going anywhere anytime soon! Before the Birchbox option (in December), I was actually thinking about the fact that I was obsessed with red, yet did not have a classic red nail polish. I had various different shades, but not a true red. I knew I had to have one this holiday season, then the sample choices came out. Birchbox, and Lo Bosworth, had read my mind. In the Lo Bosworth curated box was the most beautiful and classic shade of red nail lacquer that I could ever hope for. It was by RUFFIAN, a brand I became familiar with this summer when I received a rose gold polish and loved that one, so I knew I wouldn't be disappointed. The RUFFIAN Red was just as beautiful on as it is in the bottle. The color was so glossy and is such a classic color. The RUFFIAN nail lacquers are also made to last. I usually have problems with my nails chipping almost instantly, but that's not the case with these. I can usually go a week or two without any chips! I also paired my RUFFIAN Red with some custom nail wraps I created by ncLA. They have an amazing app, myNCLA, that lets you customize your own nail wraps with pictures you have taken. The possibilities are endless and you can have something that is truly one of a kind. I used the flowers my husband gave me for our two year wedding anniversary for my first wraps. Flowers always die and this way I can wear them anytime I want to see them! They go on very easy and last longer than some of the other nail wraps I've tried. They have pre-made ones you can purchase from their website if the customization route isn't for you. Definitely check them out if you love nail wraps and want some really neat and trendy designs!    

Tuesday, January 13, 2015

Buffalo Chicken Soup

My favorite thing about the winter is making delicious soups to eat. They just warm you straight to the bone when the days are so frigid. Making the same ones over and over can get a little mundane, so I'm always on the hunt for new exciting recipes. This recipe, found here, came on a day when I really wanted soup, but didn't have (or particularly want) to spend a ton of time cooking. I love all things buffalo chicken so I had to try it! In a super quick 30 minutes I had dinner on the table and ready to devour. Overall, the soup was very tasty. My only gripe was the only real buffalo flavoring I got was from the additional hot sauce I added to the top. My solution, I just added more obviously. The recipe is great as is if you are making it for people that don't like things too hot or even kids eating the soup (just add the extra hot sauce at your discretion). Next time though, I am going to initially add more than the 1 teaspoon, maybe bump it up to 1/4 of a cup and see how that goes! It is a quick and easy recipe for all the buffalo chicken flavor lovers out there! Hopefully it warms you up on a cold day! Enjoy!  


Buffalo Chicken Soup

Ingredients

4 cups chicken, cooked and shredded
2 Tablespoons butter
1/2 cup celery, chopped
1/2 cup onion, chopped
3 1/2 cups chicken broth (or 2 14 ounce cans)
1 1/2 cups milk
1 teaspoon hot sauce (I used Frank's)
1 1/2 cups mozzarella cheese, shredded
1 1/4 cups sharp cheddar cheese, shredded
1/2 cup parmesan cheese, shredded
1/3 cup flour

Optional
Additional hot sauce for topping
Extra cheese for topping

In a large pot, melt butter over medium heat. Add celery and onion. Cook and stir until onion is tender. Stir in broth, milk, and hot sauce.

In a bowl toss together mozzarella, 1 cup of the cheddar, parmesan, and flour. Gradually add to soup, stirring after each addition just until melted.

Stir in three cups of the shredded chicken and heat through.

Top with remaining chicken, cheese, and hot sauce if desired.

Monday, January 12, 2015

NYE with Skrillex and Diplo at Madison Square Garden

Happy New Year! Ok, it has been 2015 for a couple weeks now, but I stated last week that I would be posting about the holidays for what will seem like forever. And yes, I do still have more to come, but for now, welcome to our New Year's Eve celebration!


To start things off, Kev and I stayed true to our married New Year's tradition of having our favorite champagne, Veuve Clicquot, in our Kate Spade wedding glasses. I really don't remember how it started, but we've done it every year for the whopping whole two years we've been married so far, so why not keep it going! Plus, it's always fun to pull out the "fancy cocktail glasses" and sip champagne! Since we had plans, we cheated a little and had it before midnight with a kids countdown we found on Netflix. Silly I know, but we like to have fun and that's just what we did! For all you parents out there, the Netflix countdown was actually pretty genius. You could play it whenever to fool your kids into thinking they stayed up until midnight. It may not work if they can read time, but it could be worth a try next year if applicable to you! 


One of the biggest things we got asked about was if we were going to go to Times Square for NYE. While it looks wonderful on TV and is something everyone wants to do once in their life, it just wasn't for us. After going to Rockefeller Center earlier that week and dealing with those crowds, it just didn't seem like we would have any fun or really get to see anything. Instead, we opted to go to a concert at our winter home away from home, Madison Square Garden. I actually still have at least one more event from MSG to post regarding the holiday season, maybe you'll see it next week!    


The concert we attended was the Jack Ü tour, featuring Skrillex and Diplo who formed this super duo group in 2013. They also had special guests Yellow Claw (not pictured), Rudimental (in the collage with beers at Penn Station), and A$AP Ferg (the three part collage) join them for the NYE show. Now while I actually hadn't heard of the guest acts before, they each really put on a great show! Their songs were great, they had amazing stage presence, and their energy was out of control! If you are an EDM fan and haven't heard of them, you should defiantly check them out!


You may recall from this summer that we attended the Governor's Ball music festival which also had Skrillex, my fave DJ, as a main act. I know he's been around for a little over ten years, but I first fell in love with him when his song First of the Year (Equinox) was released off of his album More 
Monsters and Sprites in 2011. His shows and setlist never disappoint. He mixes old with new and does so flawlessly. Seeing him twice in one years time was absolutely incredible! I can't wait to see what he has in store in the future,  


The countdown starts! We weren't sure if there would be a traditional countdown that's why we did the Netflix one before we left. It was an amazing site to see everyone enjoying the moment together! May this year bring you all that you want and desire! Now I present you the duo Jack Ü.


Wednesday, January 7, 2015

December Birchbox Review: Davines Replumping Hair Filler


I have been a huge fan of Davines hair products since working at a prestigious hair salon back home when I was in school. It was so great learning about the new products that would come out and get to test them out before they hit the shelves. There were many products that I would often try and fall in love with. Actually, one of the first things I did when moving out here was to find a place that sold Davines products. Told you, huge fan! Their products always smell so great and work so well! So you can imagine my excitement when I saw this new (to me) Davines replumpling line was going to be in the Lo Bosworth curated Birchbox. Like the other products I have tried, it did not disappoint. It smelled wonderful and worked rather well too. I wish the shampoo and conditioner were a little bigger to get more use out of the whole line together, but the Superactive spray is working great on its own. It adds volume to my hair and makes it very soft. Plus, one treatment lasts about six to eight shampoos which helps if you think it's a little on the pricey side. I may not purchase the shampoo and conditioner because there are a couple of others by Davines that I love, but the replumpling spray will be a must have for me.     

Tuesday, January 6, 2015

Pepperoni Pizza Waffles

Have you ever had one of those days where you don't really feel like cooking, but you don't want to go get something? I'm having one of those moments now due to a cold that I've been battling for a couple days now. Well this recipe is great because you can have it ready in as little as 15 minutes and it's so warm and filling that it's perfect for the winter weather. The combination of the cheese and pepperoni are very traditional, but the added use of the butter with seasoning really takes it to another level. Then, you add the crunchiness from the flaky biscuits and you have yourself a version of pizza unlike you've ever had. It's also a perfect recipe for little hands to help with. Add any toppings or cheese combinations that you wish and watch them disappear. I warn you though, you may want to keep an extra can or two of biscuits around because these will be requested often! Enjoy!  


Pepperoni Pizza Waffles

Ingredients
1 can Flaky biscuits
3 Tablespoons butter, melted
1/4 teaspoon Italian Seasoning
1/4 teaspoon Garlic Powder
Amount of Pepperoni desired for topping
Amount of Shredded Mozzarella desired for topping

Optional
Pizza or Marinara sauce for dipping

Preheat your waffle maker to desired setting. Ours goes from 1-5 and I usually do a 3. Mix the melted butter and seasonings in a bowl and set aside.

Open the can of biscuits and separate them. Gently push (and lightly stretch) each of them to flatten them out, creating a thinner, bigger biscuit. You will use two for each waffle. On half of them, spread with the butter mixture begin careful not to get too close to the edges because they will be harder to seal. Top with desired amount of cheese and pepperoni. Top with another biscuit and press to seal the edges together.

Place in the waffle maker and cook until done. Crust should be golden brown and slightly crisp. Serve with warmed pizza sauce if desired.

Monday, January 5, 2015

We enjoyed Christmas from Indiana to New Jersey and New York


Happy 2015 everybody! I can happily say that I typed the year correctly on my first attempt......wooohoo the year is already off to a great start! I have so much to tell you about that I feel like I will be talking about our whirlwind holidays for months! Oh well, it was amazing! We started our journey back to Indiana with Stella and Bella on December 23 after Kev got off work. Probably not the smartest idea since we had an 11 hour drive ahead of us (it took us over 14, none of which I drove), but we were so excited to get back home that we did it anyway. I was so excited to see family, most of which I hadn't seen for about seven months, so it was a big deal for me to make as many rounds as I could! You never really know how much you miss your family until you can't just hop in your car and see them in 30 minutes.      


While we unfortunately didn't get around to seeing absolutely everyone, each place we went was uniquely different yet created lasting memories that you take for granted when you're younger. My ultimate joy from the trip back home was seeing my grandparents who were so surprised to see us. I saw my grandma's face light up as she laughed like I never had before. And the stories, ones I had never heard, were amazing. Truly something for me to hold on to until I get to see them again. I learned so many things about all my grandparents that I never knew before. It's amazing the lives they have lived! After packing in multiple meals, drinks, games (Cards Against Humanity was my favorite inappropriate family game), and all the family time we could, it was time to leave though this time we had family it tow!      


It was our first Christmas being on the East Coast, so we tried to do as many touristy things as we could. The only problem? Everyone else was doing the same thing! There were thousands of people everywhere and you couldn't move so we did what we could. One of the things we can all cross off our lists was seeing the tree and ice skating rink at Rockefeller Center. It was absolutely beautiful and enormous, though as I said before, extremely crowded. We definitely picked the wrong time to go, but you live and you learn and none of us had seen it before so it was great overall. The Empire State building was also in the festive mood lit up with its red and green lights. It is such a great place to be at Christmas time. I can see why so many people travel here to see it all! We will just have to be smarter about the times we do things next year!  


It is really great to be back and I hope you all get everything you want out of 2015! While my 2014 wasn't bad at all, I just feel that this year is going to be amazing! Look for more about what we did over the holidays in the weeks to come (hint: Madison Square Garden has become our go to place). Let's see what great memories we can make this year!