Showing posts with label easy. Show all posts

Thursday, September 1, 2016

Sweet Corn and Green Chile Baked Flautas


Maybe you have, or maybe you haven't (are you living under a rock? j/k) heard of a cookbook by the name Thug Kitchen (the original, but there are at least two more). The cookbook, while using some very colorful language, encourages people to eat healthier and eating your veggies. Well, this recipe by Thug Kitchen is so easy and tastes so amazing that even a non vegetarian, dairy and gluten lover would eat it. Trust me, I know because that person is my husband. These are pretty quick to make (even faster if you have some extra hands) and are super filling. Literally, 2 is good, 3 is pushing it, but no judgements here.......stuff you face with as many as you want! I haven't tried this yet because we don't really have a need to freeze meals for just us two, but these could probably be made and frozen in advance. Then you could just take out how many you want and bake (keep in mind they are frozen so you'll need more time). Look out for more of their delicious recipes, or get the cookbook for yourself! Enjoy!


Sweet Corn and Green Chile Baked Flautas 

Ingredients
Cooking Spray
1 teaspoon olive oil
1 cup yellow or white onion, chopped
2 teaspoons chili powder
3/4 teaspoon ground cumin
1/2 teaspoon salt
4 to 5 cloves garlic, chopped
3 cups cooked pinto beans
1 (4 ounce) can green chilies
Juice of 1/2 lime
1 cup sweet corn kernels
12 flour tortillas (we used gluten free tortillas) 

Optional
lettuce
tomatoes
salsa
avocado/guacamole 
sour cream*
cheese* 

Preheat oven to 400 degrees. Line a baking sheet with foil or spray with cooking spray.

Heat oil in a large skillet over medium heat. Cook onion until it starts to brown, about 5 minutes. Add the chili powder, cumin, salt, and garlic. Cook for 30 seconds and turn off the heat.

In a big bowl combine the beans, chilies, and lime juice. Mash them with a potato masher or spoon until a paste forms (it can be chunky). Fold in the onion mixture and corn.

Warm your tortillas. Spread about 2 Tablespoons of your bean mixture in a line on the left (see below, or right if you're a rebel) side of the tortilla. Roll the tortilla up from left to right (right to left if you spread your mixture on the right). You can place a little of the mixture on the opposite end to help it stay closed if needed. Place the flauta seam side down on the baking sheet, leaving an inch or two between each one. Repeat until finished.


Lightly coat with cooking spray and bake for 10 minutes or until golden. Turn over and bake “seam side” an additional 5 to 7 minutes or until golden. Serve warm with your toppings of choice.

*Keep in mind it won't be dairy free if that's what you're going for.


Thursday, August 18, 2016

Quinoa Enchilada Casserole

Do you ever have those days where you wake up and realize your day is going to be so busy that you already know you won't want to cook dinner? Well, we did the other day. We knew we were going to be gone all day exploring some new to us places in San Francisco that we knew we didn't really want to come home and cook. Our solution? This recipe right here. While Kev cooked the quinoa, I got everything else ready in a big bowl and we had it ready in no time. After everything was mixed, we just put it in the pan (omitting the cheese on top) with some foil and stored in the refrigerator until we were ready to cook. Once we were ready to cook, we put it in without the cheese for about 5 minutes since we were starting from a colder state than it would normally be in if you did it from beginning to end in one shot. It ended up turning out amazing! The only thing I would change (which is my personal preference, but feel free to try) is subtracting the cilantro (yuck) and doubling the green chilies (yum). It is such an easy, healthy take on Mexican food that you can't not try it! Enjoy!


Quinoa Enchilada Casserole

Ingredients
1 cup quinoa
1 (10-ounce) can mild enchilada sauce
1 (4.5-ounce) can chopped green chiles, drained
1/2 cup corn kernels, frozen, canned or roasted
1/2 cup canned black beans, drained and rinsed
2 tablespoons chopped fresh cilantro (I opted out)
1/2 teaspoon cumin
1/2 teaspoon chili powder
Kosher salt and freshly ground black pepper, to taste
3/4 cup shredded cheddar cheese, divided
3/4 cup shredded mozzarella cheese, divided

Optional
1 avocado, halved, seeded, peeled and diced
1 Roma tomato, diced

In a large saucepan of 2 cups water, cook quinoa according to package instructions; set aside.

Preheat oven to 375 degrees. Lightly oil an 8x8 or 2 quart baking dish or coat with nonstick spray.

In a large bowl, combine quinoa, enchilada sauce, green chiles, corn, black beans, cilantro, cumin and chili powder; season with salt and pepper, to taste. Stir in 1/2 cup cheddar cheese and 1/2 cup mozzarella cheese.

Spread quinoa mixture into the prepared baking dish. Top with remaining cheeses. Place into oven and bake until bubbly and cheeses have melted, about 15 minutes.

Serve immediately, garnished with avocado and tomato, if desired.


Friday, August 12, 2016

Buffalo Chicken Alfredo


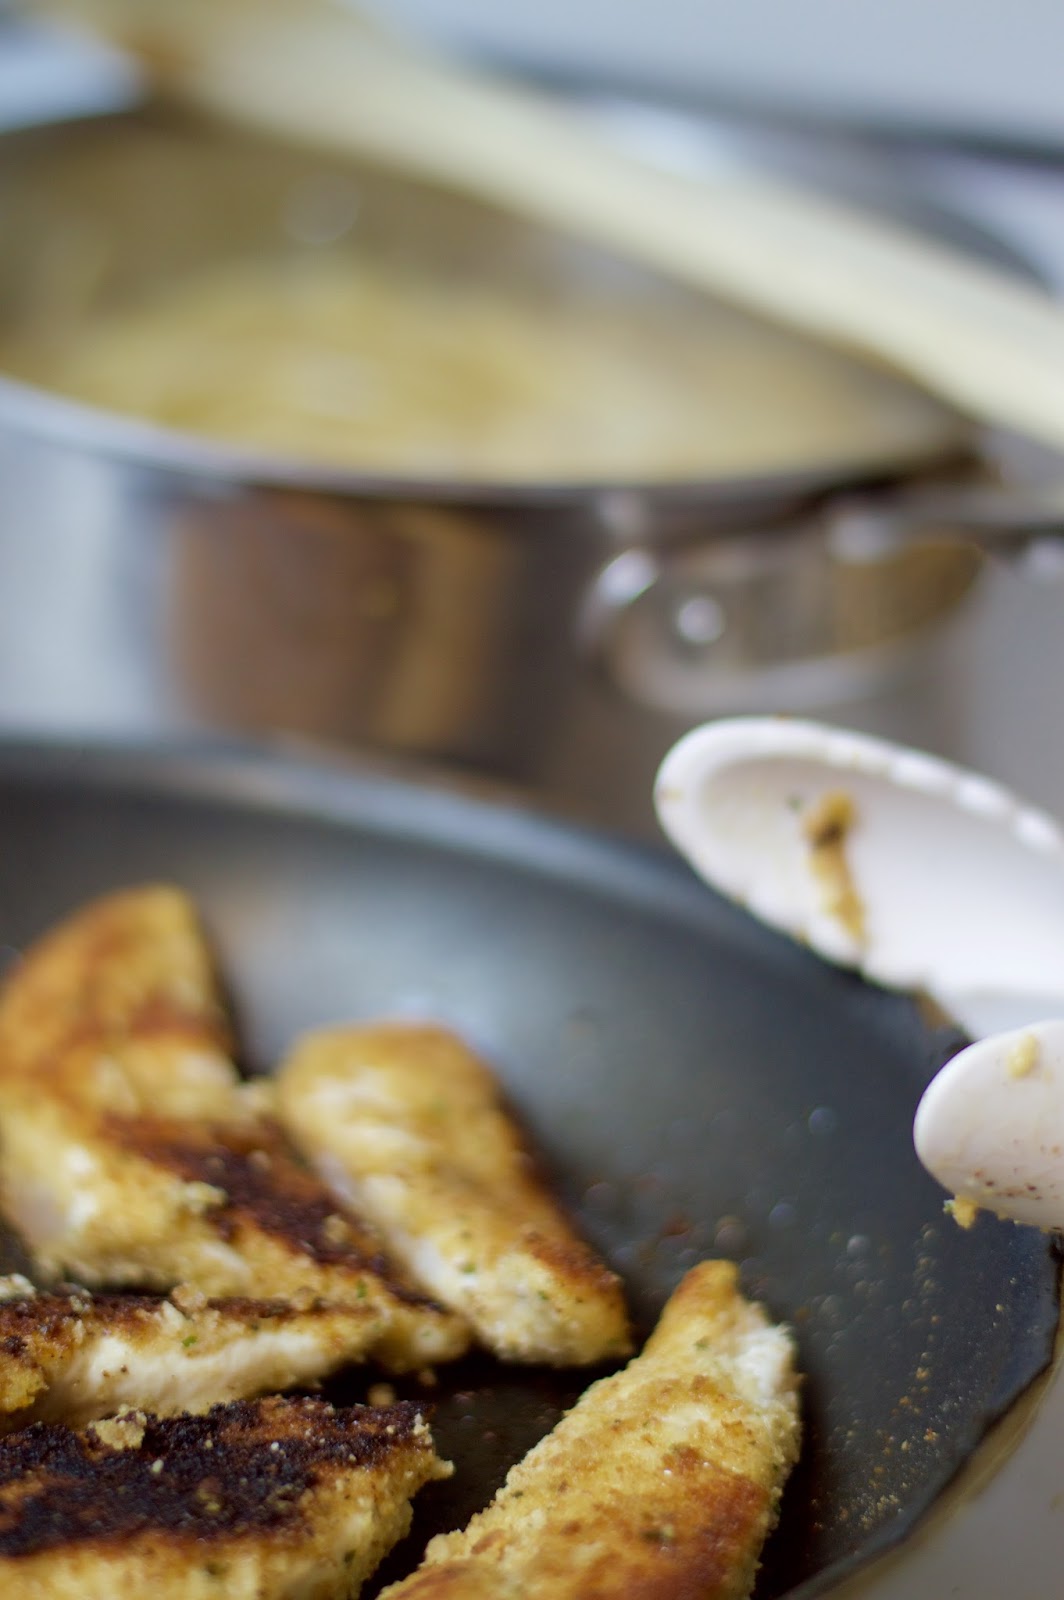
Buffalo Chicken Alfredo, as the name suggests, consists of buffalo sauce, chicken...and you guessed it...alfredo.  Each component individually  is delicious but how does it stack up when combined?  Well I'm here to tell you that it is indeed....delicious.  I personally thought that the cheese-spice balance was perfect, although Casey thought it was a tad spicy(this is Kevin writing btw).  For this recipe we used original Frank's Red Hot sauce which is one of my favorites.  If you don't like as much heat you could try buying Frank's wing sauce which isn't as spicy, or make your own buffalo wing sauce by melting in some butter with original Frank's(fun fact: this is how the original buffalo sauce was made).  We used smaller chicken tender cutlets to get a higher breading to chicken ratio which worked out very nicely with the pasta.  This was a pretty easy recipe to make, and well worth the investment of time.  Enjoy!


Buffalo Chicken Fettuccine Alfredo

Ingredients
1 lb fettuccine pasta
2 Tablespoons olive oil
1 lb chicken tenders
1 egg, lightly beaten
2 Tablespoons milk
1 ½ cup Italian style bread crumbs
2 Tablespoons butter
1 cup half and half
3 oz Mascarpone cheese
½ cup buffalo wing sauce
½ cup Parmesan cheese
salt, pepper

Cook pasta according to package directions.

Meanwhile, combine egg and milk in a bowl. Add breadcrumbs to a separate bowl.

Heat oil in a skillet over medium heat. Dredge chicken in egg mixture, followed by bread crumbs. Cook in skillet until evenly browned, about 6-8 minute per side, depending on the thickness of your chicken. Set chicken aside and keep warm.

Melt butter in the same skillet, slowly pour in half and half and stir in mascarpone cheese until it is fully incorporated. Whisk in Parmesan cheese and buffalo wing sauce. Let sauce cook for at least 1 minute to thicken.

When pasta is ready, drain and combine with buffalo sauce. Serve with chicken tenders.


Friday, January 30, 2015

Raspberry-Honey and Blackberry-Honey Butter on Toast

Last month I had the pleasure of winning the December book Birchbox featured in their bookclub! Not only is it exciting to win something, but this was an amazing cookbook which is obviously right up my alley. So when my Homemade Decadence cookbook by Joy Wilson came, I was beyond stoked and wanted to start whipping things up right away! I started with the first recipe in the book because I already had all the ingredients and like I said, I just had to get started right away. It is a super easy recipe for fruit infused butter. Joy did hers with the raspberries and since I also had blackberries, I decided to try those too! The results were amazing. It is something so simple that will wow your family (or guests) at your next breakfast or brunch, or keep it for yourself because it lasts up to three days. When you make this, make sure you follow the plastic wrap step. I did one with and one I just placed in a Pyrex container. The one in the Pyrex was a little more runny then I would have liked, but tasted good nonetheless. Whether you are in a pinch and need something "fancy" or just want to serve something a little different, you should try this recipe out. You will love it I'm sure! Stay tuned for Roasted-Potato Breakfast Nachos, the next recipe I made from my wonderful cookbook! As always, enjoy! 


Fresh Raspberry-Honey Butter and Fresh Blackberry-Honey Butter 

Ingredients
1/2 cup (1 stick) Unsalted butter, divided in half, room temperature
4 Raspberries
4 Blackberries 
2 Tablespoons Honey, divided
1/4 teaspoon salt, divided 

Divide the butter between two bowls. In one, place the raspberries, 1 Tablespoon honey and a dash of salt. In the other place the same except add the blackberries to it. Mash the ingredients together with a fork until somewhat combined. Scoop the butter into plastic wrap, pressing down to form a disk shape. Refrigerate until ready to use. 


Friday, January 23, 2015

Nacho Crusted Crescent Dog

This is one of those recipes that reminds me of sitting around the table and having a family game night. You want something that is portable, but yet not something that will make you leave the intense board game that is going on. Well this recipe, found here, quick and easy and that you think you'll eat a ton of, but it is surprisingly filling. My husband picked up two and was struggling to finish the second and that guy can eat! The cheese is ooey and gooey on the inside and the chips provide a nice crunch on the outside. I think it is wonderful as is, but you can serve it with a dipping sauce if you would prefer. It is perfect for all ages, but I think the kids will especially love this one! In under 30 minutes your dinner will be hot and ready and you can focus on winning your family game night! It's a win-win for you! Enjoy! 


Nacho Crusted Crescent Dog

Ingredients
1 8 count can crescent rolls
4 slices cheese (I used Velveeta)
4 hot dogs (I used Nathan's all beef hot dogs)
Approximately 1 cup Nacho cheese chips, crushed
Approximately 1/2 cup Milk or water

Preheat oven to 375 degrees (or as directed on your crescent can). Prepare baking sheet with foil or Silpat.

Unroll your crescents, dividing into 4 rectangles. Place one slice of cheese on top followed by one hot dog. Fold the ends of the crescent rectangles over the hot dogs. Fold one of the longer ends over the hot dog and roll, sealing the edges. Roll the crescents in milk or water then dip into the crushed nachos, pressing slightly. Place on baking sheet seam side down.

Bake as directed on can (I had to let mine bake about 7 minutes more) and let sit 5 minutes before serving.  

Thursday, January 15, 2015

Jalapeño Cheddar Bagel

Since this is a new year, I decided to change things up ever so slightly on my blog. Not a big change or anything, but I like my dedicated days to certain material that way if you aren't a fan of one thing, maybe there is something else you prefer and know what day to look for it. Like I said, it's not a huge change and you probably wouldn't notice if I didn't bring it up :). On Thursdays, instead of just doing a regular (mostly dinner) recipe, I am going to do quick and easy recipes. They will be simple breakfast, lunch, or even dinner items such as the one I'm starting with today or, things such as smoothies and juices. It will also be super helpful for those with the New Years resolution to lose weight, get healthy, etc. because I these are things I generally eat and calculate the calories for so I'm sharing the information. I can't stick to a certain diet type because I love food too much, but I can count calories, super easy thank to my Fitbit. So without further delay, I bring you the first of my quick and easy recipes. 

This jalapeño cheddar bagel has been one of my favorite things to eat lately. It is great because you can really eat it any time of the day. It's a perfect savory breakfast, a great quick lunch, a hearty snack, or I have even served it (half to each of us) with tomato soup in lieu of grilled cheese. You can obviously add more of any of the ingredients listed, but the way I make it come to between 205-210 calories (the jalapeños are the variance in the number). In under 10 minutes you can have a flavorful meal that won't hurt your waistline! I am addicted to these and you will be too once you try them! Enjoy!  


Jalapeño Cheddar Bagel

Ingredients
Bagel slim (I use Thomas brand Everything bagels)
1 Tablespoon cream cheese (I use 1/3 less fat Philadelphia, split between the two halves)
Jalapeño slices
1/8 cup cheddar cheese, shredded 

Preheat your broiler. Spread the cream cheese on the two bagel halves. Top with as many jalapeño slices as desired. Sprinkle with cheddar cheese. Broil about 3-5 minutes or until cheese is melted.

Tuesday, January 13, 2015

Buffalo Chicken Soup

My favorite thing about the winter is making delicious soups to eat. They just warm you straight to the bone when the days are so frigid. Making the same ones over and over can get a little mundane, so I'm always on the hunt for new exciting recipes. This recipe, found here, came on a day when I really wanted soup, but didn't have (or particularly want) to spend a ton of time cooking. I love all things buffalo chicken so I had to try it! In a super quick 30 minutes I had dinner on the table and ready to devour. Overall, the soup was very tasty. My only gripe was the only real buffalo flavoring I got was from the additional hot sauce I added to the top. My solution, I just added more obviously. The recipe is great as is if you are making it for people that don't like things too hot or even kids eating the soup (just add the extra hot sauce at your discretion). Next time though, I am going to initially add more than the 1 teaspoon, maybe bump it up to 1/4 of a cup and see how that goes! It is a quick and easy recipe for all the buffalo chicken flavor lovers out there! Hopefully it warms you up on a cold day! Enjoy!  


Buffalo Chicken Soup

Ingredients

4 cups chicken, cooked and shredded
2 Tablespoons butter
1/2 cup celery, chopped
1/2 cup onion, chopped
3 1/2 cups chicken broth (or 2 14 ounce cans)
1 1/2 cups milk
1 teaspoon hot sauce (I used Frank's)
1 1/2 cups mozzarella cheese, shredded
1 1/4 cups sharp cheddar cheese, shredded
1/2 cup parmesan cheese, shredded
1/3 cup flour

Optional
Additional hot sauce for topping
Extra cheese for topping

In a large pot, melt butter over medium heat. Add celery and onion. Cook and stir until onion is tender. Stir in broth, milk, and hot sauce.

In a bowl toss together mozzarella, 1 cup of the cheddar, parmesan, and flour. Gradually add to soup, stirring after each addition just until melted.

Stir in three cups of the shredded chicken and heat through.

Top with remaining chicken, cheese, and hot sauce if desired.

Tuesday, December 9, 2014

Easy Fajita Chicken Bake

If you are anything like us, you have a taco night at least once a month. Honestly, we would do one every week if it wasn't my mission to try to get through all of my saved recipes on Pinterest. Tacos are quick, easy, and most importantly......delicious! Well the recipe featured today has all those attributes plus, it can be served multiple ways. You can dish it up as it is prepared or you can serve it on tortillas with your toppings of choice. I did change a couple of things with the original recipe. I decided to use a whole packet of taco seasoning instead of just a Tablespoon or two. I don't know what the taste difference is to compare, but the way I did it had the perfect amount of flavor. I also would recommend not putting your cheese on right away like the original recipe, and the way I did it, suggests. It left my cheese overly melted off of my chicken. Next time I will cover with foil, let the chicken bake for most of the time, then add the cheese in the final 10 minutes. The only other thing I changes was using chicken tenders instead of chicken breasts. I knew we were going to eat ours like tacos at some point (plenty of leftovers) so I figured it would be easier. Feel free to do chicken breasts if your prefer. It was great to have another take on taco night, especially with a dish that packs so much flavor! Enjoy!   


Easy Fajita Chicken Bake

Ingredients

1 1/2-2 pounds chicken tenders
1 packet Taco seasoning
2 bell peppers in assorted colors, thinly sliced
1 small red onion, thinly sliced
2 Tablespoons olive oil
1/2 cup cheddar or Mexican blend cheese, shredded

Optional
Tortillas
sour cream
jalapeños
taco sauce

Preheat your oven to 375 degrees. Trim the chicken, if needed, and lay them in a single layer in a glass baking dish.

Sprinkle the taco seasoning evenly over the top of the chicken. Then, lay your onions and peppers on top of the chicken, again, spreading out evenly.

Drizzle the olive oil over the peppers and onions. Cover with aluminum foil and bake 30 minutes. Uncover and sprinkle with cheese. Bake an additional 5-10 minutes, or until cheese melts, chicken is cooked through and juices run clear.


Thursday, November 20, 2014

Banana and Peanut Butter Ice Cream

Do you have a sweet tooth but are trying to be healthy? Or, do you love bananas and are looking for another way to enjoy them? If you answered yes to either of these questions, than you must try this recipe from Two Peas & Their Pod. Whenever Kev goes out of town, I take advantage of it and make recipes that I know he won't eat (and are usually healthier too) and this was definatly one of them. Although it isn't his cup of tea, I absolutely loved it! It had the sweetness of ice cream, but far fewer calories, making it great for the waistline! The recipe listed is indicated to yield 4 servings. I served myself a serving and froze the rest for about a week. It was still amazingly perfect! This would be great to make in the spring or summer especially in a large batch for parties. For a more decadent treat, you could try adding cocoa powder or chocolate syrup of you like! Enjoy now or wait until it warms up!


Banana and Peanut Butter Ice Cream

Ingredients

4 large very ripe bananas
2 Tablespoons peanut butter

Peel bananas and slice into 1/2 inch slices. Arrange the banana slices in a single layer on a baking sheet. Freeze for at least 1-2 hours.

Once the bananas are frozen, place them in a blender and puree, scraping down the sides as needed, until the mixture is creamy and smooth. Add the peanut butter and pulse a few times to combine. Serve immediately for soft-serve ice cream consistency, but if you prefer harder ice cream, place in the freezer for a few hours and then serve.

*The "ice cream" will melts quickly so I prefer to put it in the freezer for a little bit.


Friday, November 14, 2014

Avocado and Chicken Burrito

 Happy Friday everyone! I hope you have some great plans for the weekend! We are going to brunch (one together and I'm meeting the girls) and to the IU/Rutgers game with some friends from back home! Yeah! Well no more wasting any more of your weekend so let's get to it. At some point in your life you have probably owned a Forman Grill. I used to use mine for EVERYTHING! Burgers, chicken, etc., etc., until I learned other ways of cooking. Now our Forman has become a glorified quesadilla and quick burrito maker. It's perfect because it keeps it closed and gives the tortillas a nice crisp crunch to them while heating your items all the way through. I love this meal because it can't get much quicker or easier. It's all done in less than 30 minutes (I bake my chicken in the oven). I use the Grilled Tyson breasts because they have a nice grilled flavor to them (duh) and they are convenient to keep a bag around and grab as needed. You could omit the chicken if you are vegetarian, add spices, or different cheeses to really make it your own! Next time you are looking for some quick and easy, try this burrito out! As always, enjoy!   


Avocado and Chicken Burrito

Ingredients 
1 Tyson Grilled and Ready Chicken Breast, cut or shredded
1 Avocado, chopped
1/2 cup Mexican cheese, shredded 

Optional
Sour Cream
Taco Sauce
Salsa

Cook the chicken according to the package instructions. Once cooked, shred or cut into pieces.

Preheat your Forman Grill. 

Combine the chicken, avocado, and cheese in a bowl and mix together. Place tortilla on Forman for a few seconds to make pliable then fill with your mixed ingredients and fold up burrito style. Place on Forman for about 5 minutes (once tortilla is a little crisp and heated through. Cut in half, serve with desired condiments, and enjoy!


Tuesday, October 14, 2014

Quick Cinnamon Roll Waffles

If your household was anything like mine growing up, we had these Pillsbury Cinnamon Rolls quite frequently. Honestly I feel like it was about a weekly occurrence in our house. Well, if you follow me on Instagram, a few weeks ago I posted a photo of my awesome new All-Clad waffle maker and promised some recipes. Now while this isn't the crème de la crème of recipes, it is super easy and super fast and combines my childhood with my adult life. Think scrambling to get the kids ready on a school day or, in my case, husband running out the door for work. You don't have 20 to 30 minutes to prepare breakfast, so what do you do? You heat your waffle maker, pop the cinnamon rolls open, and place to inside at once that cook for 5 minutes or less. Like I said, a super easy and super quick recipe. They have the same great taste and at 140 calories a pop (with icing), they aren't too bad on your waistline. You can refrigerate what you don't use to use another day! Enjoy!


Quick Cinnamon Roll Waffles

Ingredients
Pillsbury Cinnamon Rolls (duh)
Olive Oil Spray (or whatever you use already)

Preheat your waffle maker to the setting of your choosing. I set ours to a 2 or 3 usually. When preheated, spray lightly with olive oil spray and place 2 cinnamon rolls (our is a 2 square, your may be bigger) in the waffle maker, close the top, and cook until done, about 3-5 minutes.

Place some icing on each one when they come out so it melts and serve!